
Signing Up + Customizing Your Storefront

So you’re ready to open a store... welcome!
Over the next few weeks, we’ll help you make your store look and work its best by teaching you tips and tricks to navigate your storefront, upload your designs, share your cool products on social and get paid!
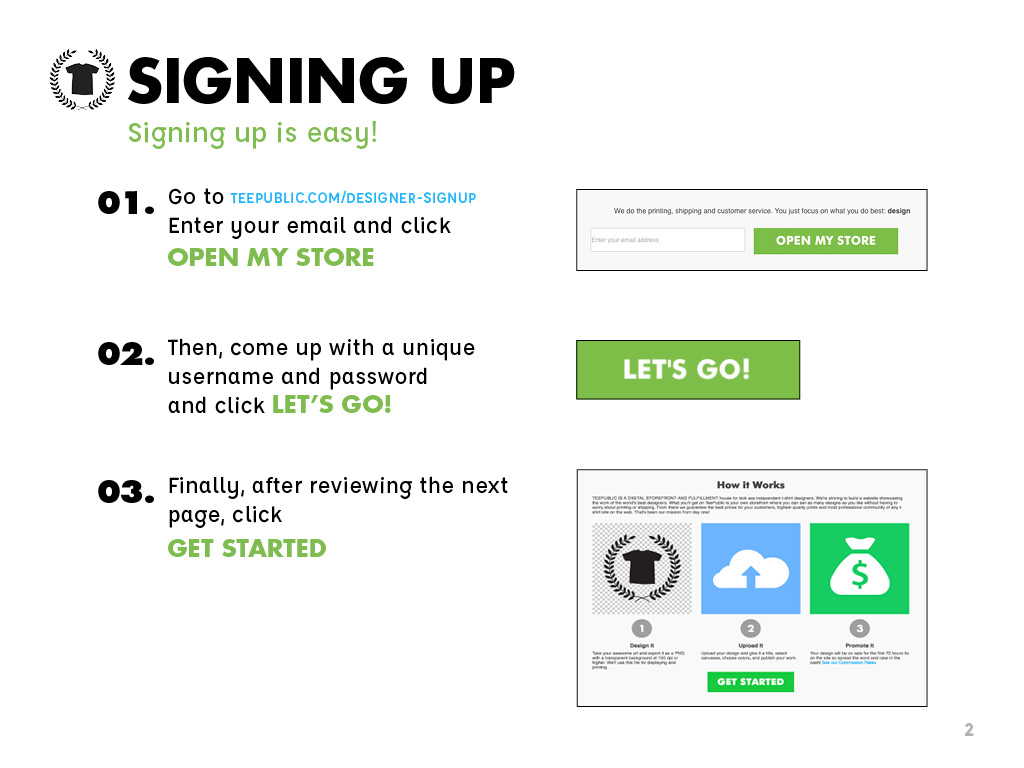
Signing Up
Signing up is super easy! Just go to www.teepublic.com/designer-signup, open your store, create a username and password, then GET STARTED!
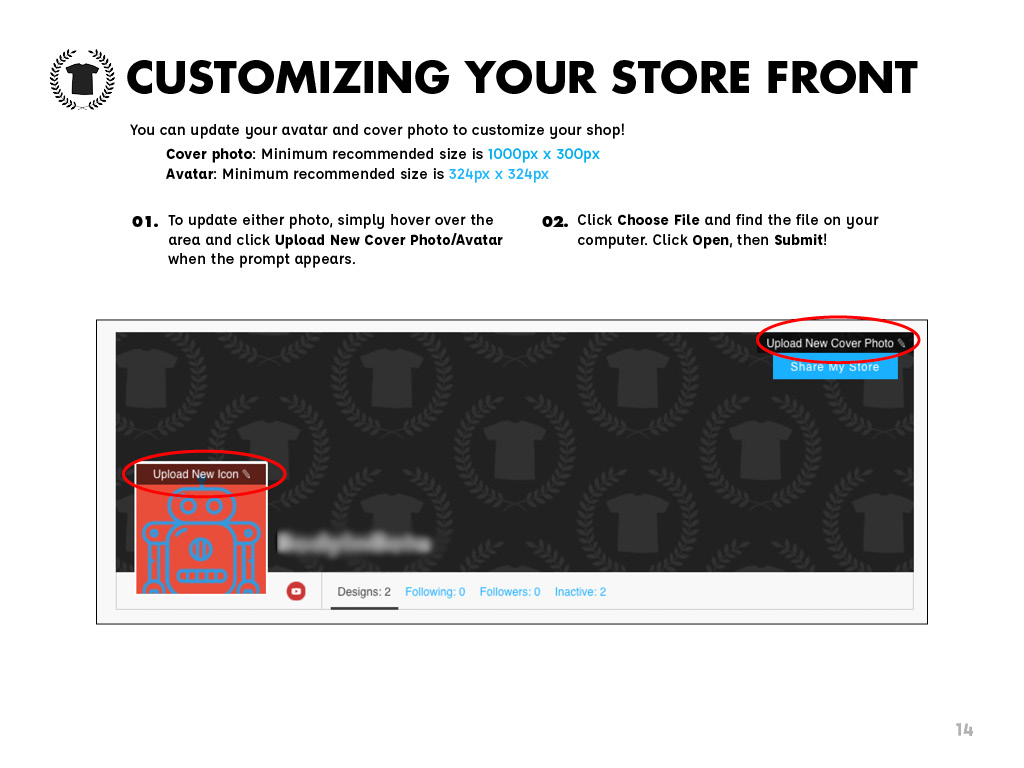
Customizing Your Storefront
You signed up. Right on! Now it’s time to tune up your new shop. Your storefront is the first contact a customer has with your brand, so you want to make sure it reflects your style. People buy art based on stories, so the more your personality shines through, the better!
To customize it is easy: Just make sure your cover photo is larger than 1000px x 300px and your avatar is larger than 324px x 324 px.
1. To update either photo, simply hover over the area and click Upload New Cover Photo/Avatar when the prompt appears.
2. Click Choose File and find the file on your computer. Click Open, then Submit!
Great start! We’ll be back next week to give you the update on UPLOADING!
If you have any questions until then, feel free to give us a shout at [email protected].
XO,
TeePublic


